Envify - Your Secret Vault in Flutter
Keeping Your Secrets Hidden using the Envify Package in Flutter.

As a developer, I enjoy coding in Dart & Flutter.
OVERVIEW
As a Flutter Developer, there comes a time when you need to specify some confidential information in your source code such as API Keys, File Paths, URLs, Client-Side Secret Key etc, so the question arises how would you:
✔️ Keep this data confidential.
💉 Integrate it without disclosing it inside the source code.
🛡️ Protect it if a hacker dismantles the code.
For such cases, Envify¹ is your ready-made solution that would inject Environment Variables inside your source code without breaking a sweat.
THE BIG PICTURE
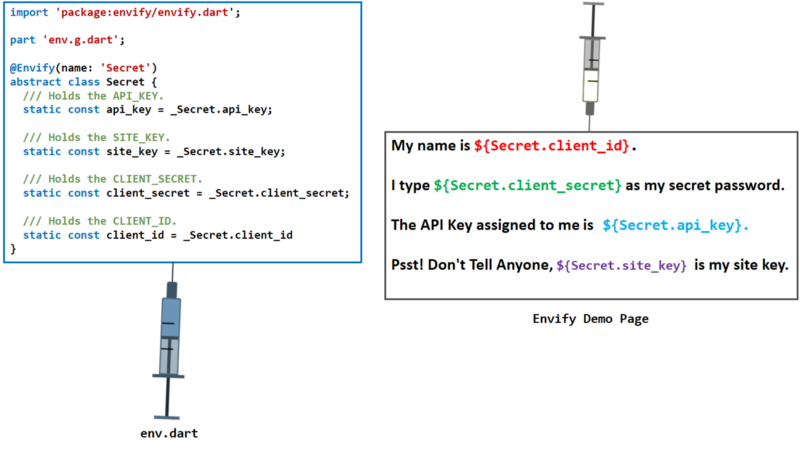
At the root level of your flutter project (outside the lib folder), you would create an environment file .env possessing all your secret data. After adding the envify package to the pubspec.yaml file, you would create an env.dart file as shown in the below illustration. Once you’re done, you would run the command from the terminal and an env.g.dart would be generated holding all your secret data as a dart privateclass.

Afterwards, you would simply inject the environment variables anywhere in the code by using the Secret abstract class fields.
REQUIRED PUBSPEC PACKAGES
In the pubspec.yaml file, add the packages as shown in the below snippet.
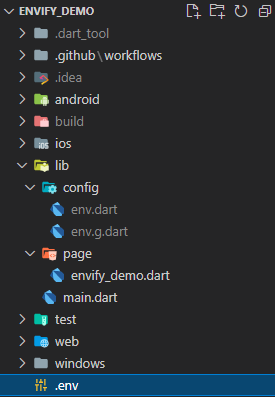
THE PROJECT ARCHITECTURE
The below figure illustrates the architecture used throughout the project.
LET’S BEGIN CODING!
Step - I: Add Envify related files to .gitignore
Before starting to code, add all the files related to envify in your .gitignore as shown in the below snippet.
Step - II: Create an environment file.
Outside the lib folder, create a .env file and type down all the secret information that you wish to inject inside your source code, refer to the below snippet.
Step - III: Create Env.dart file in the Config Folder
Under the config folder, create a env.dart file, refer to the below snippet.
Here we define an abstract class Secret with the @Envify decorator having the name parameter as Secret and static const abstract fields.
According to the API documentation²:
By default, the generated class will be named as the name of the annotated class with a
_prefixed. You can change it using thenamefield. Note that the_will always be prefixed.
Step - IV: Run The Command From The Terminal
Keep your abstract field’s naming convention the same as the one’s you’re going to generate or else the envify_generator would raise errors as shown in the below log.
Also note that the first time you’ll create this file, the compiler would say that it can’t find _Secret as shown in the below figure.
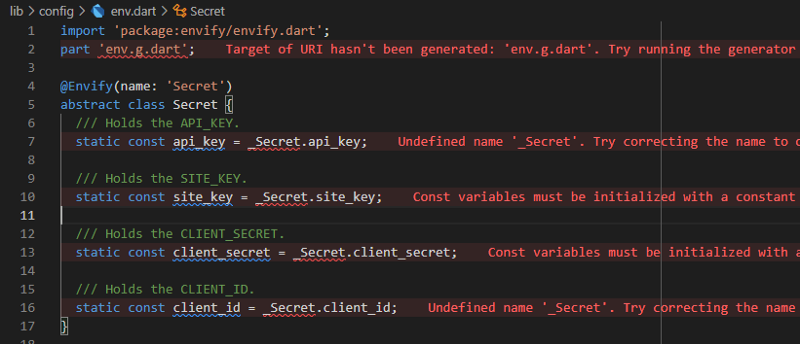
Don’t be afraid, this happens because you haven’t generated the _Secretclass yet. To generate the env.g.dart file, run the below command from your terminal.
Step - V: Invoking Secrets In The Source Code
Congratulations! You can now invoke your secrets in the source code without revealing them. In the below snippet, you can observe that inside the textof each child TextSpan the data has been invoked using the Secret abstract class.
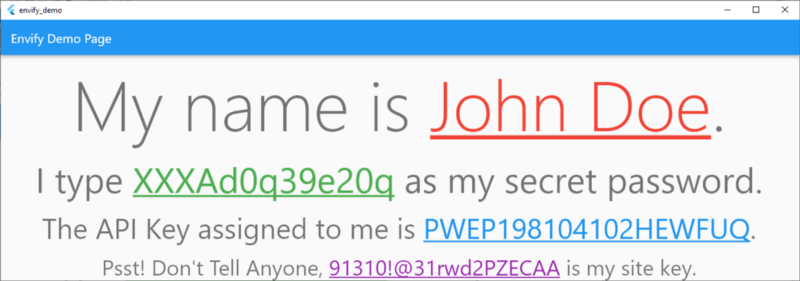
Step - VI: Run The Demo App
The below screen depicts the final results after successfully running the app.
GITHUB WORKFLOW
Now you might be wondering how you’re going to deliver the app to your client. No worries, just follow the below steps.
Step - I: Encrypt .env & env.dart Files
- Open up “Git Bash” in the Visual Studio Code terminal.

2. Navigate to the .env path & encrypt it to base64 format as shown below.
$ base64 "C:\envify_demo\.env"
3. Repeat step 2 for env.dart as well.
$ base64 "C:\envify_demo\lib\config\env.dart"
4. Note down the encrypted code of these files.
Step - II: Create Action Secrets in GitHub Repo Settings
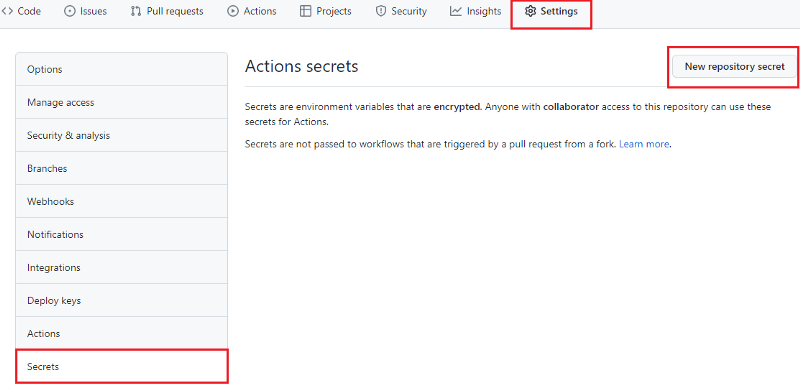
- Open your GitHub Repo Settings on the browser, select “Secrets” & click on the “New repository secret” button.
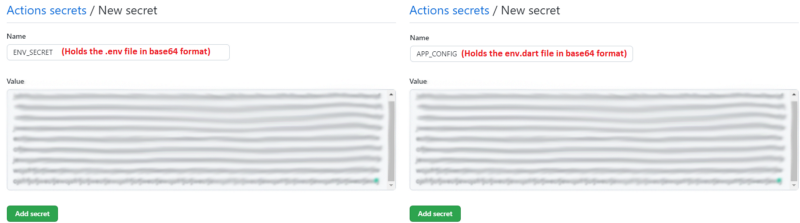
2. Paste the base64 codes and hit the “Add Secret” button as shown in the below image.
Step - III: Execute The Script via GitHub Actions
Copy the below script, add your firebase project id in the placeholder text & execute it.
Step - IV: Visit The Web App
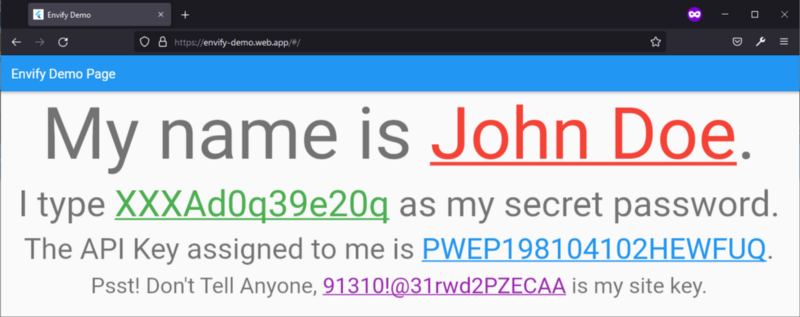
After a successful build, the web app³ is live as shown in the below image.
Visit the envify_demo⁴ GitHub Repository to get the source code.
ACKNOWLEDGMENT
Thanks to Frenco⁵, the developer who created this package on the pub.dev.
REFERENCES
[1]: envify | Dart Package
https://pub.dev/packages/envify
[2]: envify | API Docs
https://pub.dev/documentation/envify/latest/#change-generated-class-name
[3]: Envify Demo | Web App
https://envify-demo.web.app
[4]: Envify_Demo | GitHub Repo
https://github.com/Zujaj/envify_demo
[5]: Frenco | GitHub
https://github.com/frencojobs


